

In today’s fast-paced digital world, efficient communication and documentation are key to business success. Microsoft Teams has become an essential tool for many organizations, providing a platform for seamless collaboration. One of its standout features is transcription, which can transform the way teams handle meeting notes and follow-ups. In this article, we’ll explore how to record and get meeting transcripts using Microsoft Teams, making sure you don’t miss a single detail from your discussions.
Microsoft Teams transcription is a feature that automatically transcribes spoken content during a meeting into text. This tool is invaluable for those who want to ensure that no detail is missed, providing a written record of everything discussed. It not only aids in documentation but also enhances accessibility for those who may have hearing impairments.
Why Use Microsoft Teams Transcription?
- Accurate Record Keeping: Transcription ensures all spoken words are captured, allowing for precise meeting documentation.
- Enhanced Accessibility: It provides an inclusive environment for participants with hearing challenges.
- Time-Saving: Quickly review meeting points without listening to entire recordings.
- Searchable Text: Easily find specific information using keyword searches within transcripts.
How to Enable Microsoft Teams Live Transcription
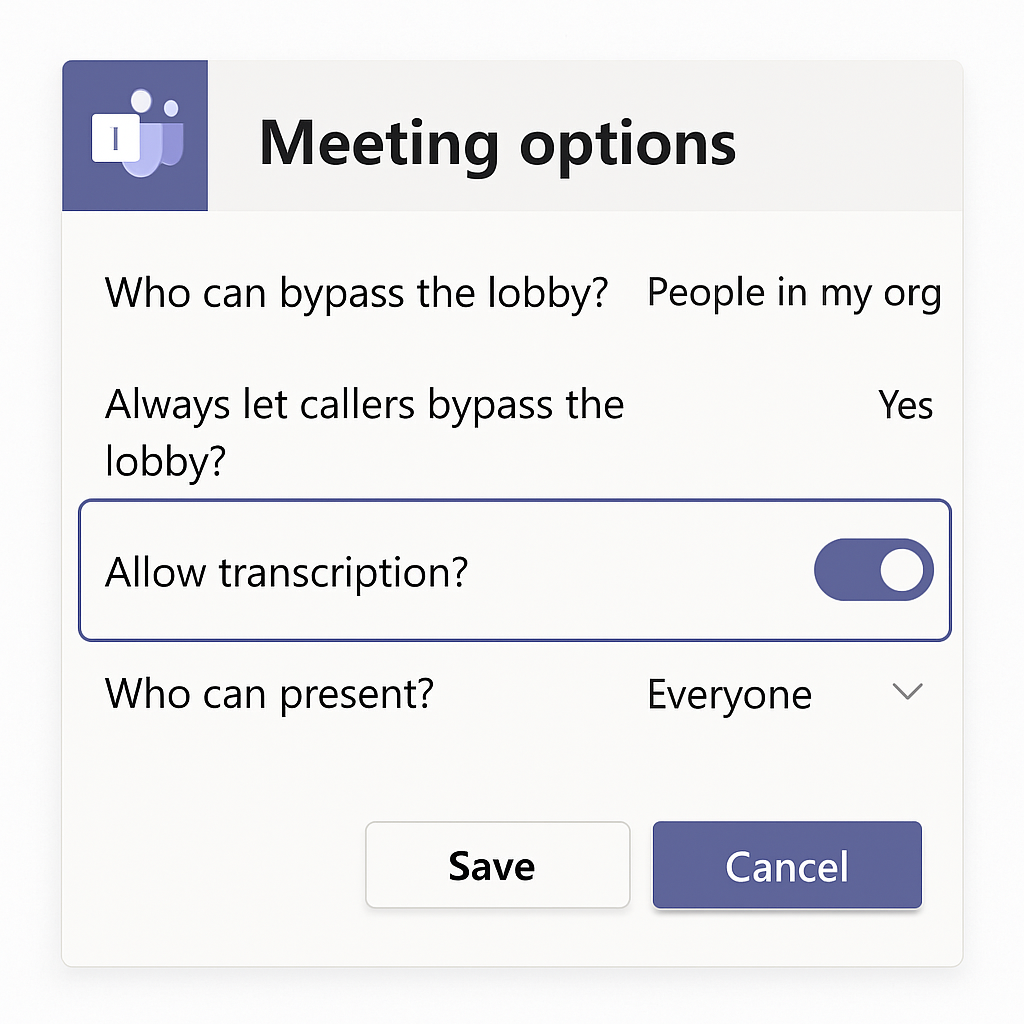
Before using transcription in Microsoft Teams, you need to ensure that your organization’s IT admin has enabled this feature. Once confirmed, follow these steps:
Step 1: Start a Meeting
To begin, schedule or start a new meeting in Microsoft Teams as you normally would. Ensure you have the necessary permissions to enable transcription.
Step 2: Enable Transcription
During the meeting, click on the three-dot menu (ellipsis) on the meeting control bar. Select “Start transcription” from the dropdown menu. The live transcription will begin, capturing all spoken content in real-time.
Step 3: Notify Participants
Once transcription is enabled, Microsoft Teams will notify all participants that the meeting is being transcribed. It’s important to inform attendees beforehand to ensure transparency and consent.
Step 4: Access Live Transcription
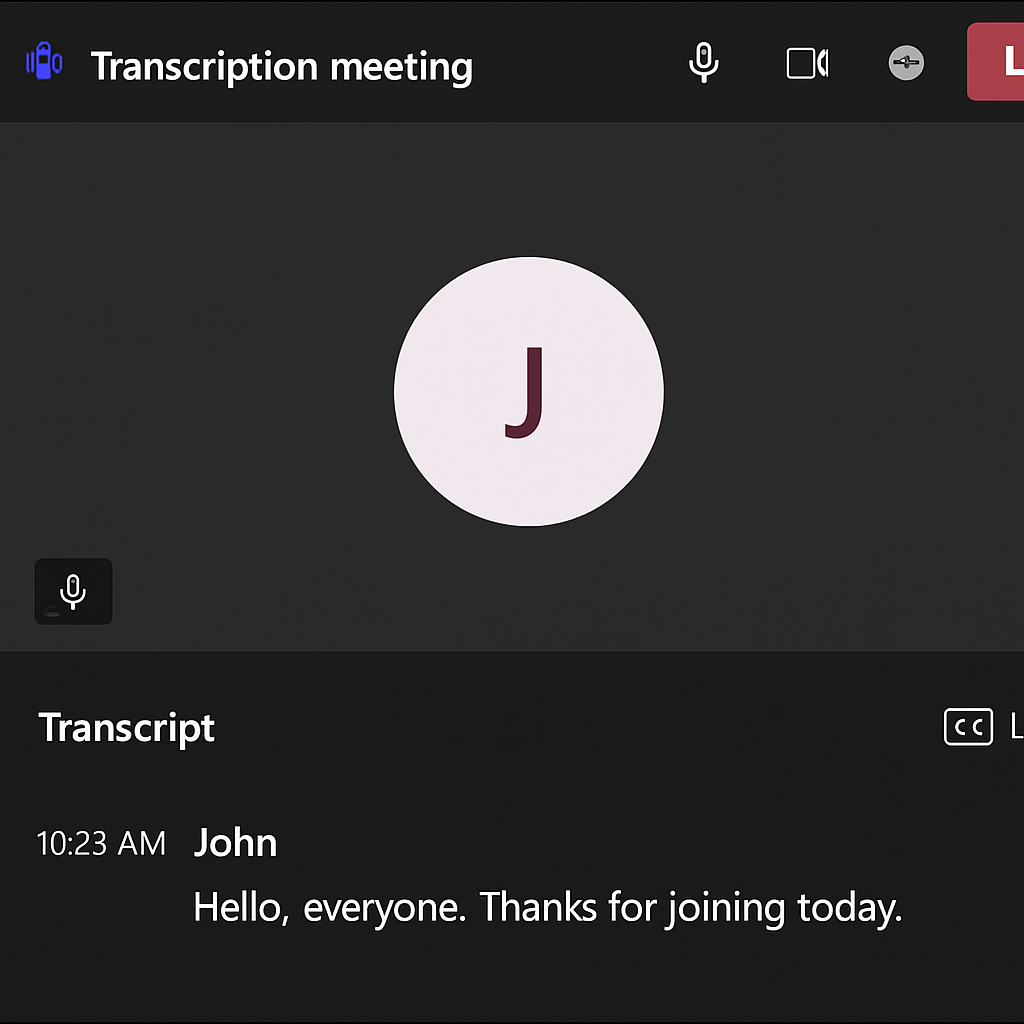
As the meeting progresses, the live transcription will appear on the right side of the screen. Participants can follow along and even scroll back to review previous sections of the conversation.
Recording a Microsoft Teams Meeting
In addition to transcription, recording meetings in Microsoft Teams allows you to capture audio, video, and screen sharing activity. Here’s how to record your meeting:
Step 1: Start Recording
In the meeting, click on the three-dot menu on the meeting control bar. Select “Start recording.” This will capture all aspects of the meeting, including the live transcription if enabled.
Step 2: Stop Recording
Once the meeting concludes, or if you wish to stop recording earlier, return to the same menu and select “Stop recording.” Microsoft Teams will automatically save the recording to Microsoft Stream or OneDrive, depending on your organization’s settings.
Step 3: Share the Recording
After the meeting, you can share the recording with participants or others who need access. Simply copy the link from Microsoft Stream or OneDrive and distribute it as needed.
Accessing and Using Meeting Transcripts
Once your meeting is over, you can access the transcript for review or sharing. Here’s how:
Step 1: Locate the Transcript
Transcripts are stored alongside meeting recordings. You can find them in the meeting chat or in Microsoft Stream/OneDrive, depending on your organization’s setup.
Step 2: Download the Transcript

To download the transcript, navigate to the meeting details in Microsoft Teams. Click on the “More actions” button (three dots) next to the transcript and select “Download.” The transcript will be downloaded in a .vtt or .txt format.
Step 3: Share and Utilize the Transcript
Once downloaded, you can share the transcript with colleagues or use it to create meeting summaries, action items, or detailed reports. The text format allows easy searchability for specific topics or keywords.
Best Practices for Using Microsoft Teams Transcription
To make the most of Microsoft Teams transcription, consider these best practices:
- Inform Participants: Always inform meeting attendees that transcription is being used, ensuring transparency and obtaining consent.
- Check Permissions: Verify that transcription and recording features are enabled by your IT admin.
- Review Transcripts: After meetings, review transcripts for accuracy and to create actionable insights.
- Store Securely: Ensure transcripts are stored in secure locations, adhering to your organization’s data protection policies.
Conclusion

Microsoft Teams transcription is a powerful feature that enhances communication, documentation, and accessibility. By following the steps outlined above, you can efficiently record meetings and access comprehensive transcripts, ensuring that no detail is missed in your important discussions. Implementing these practices can significantly streamline your team’s workflow, improve record-keeping, and foster a more inclusive working environment. Embrace the capabilities of Microsoft Teams transcription today to elevate your organization’s collaboration efforts.